Build and test a CRUD app in Go
06-20-2025: ngrok's Go SDK has now reached v2! This v2 update modernizes the API and exposes new features, like Traffic Policy, in an interface that’s easier to learn, use, and maintain.
Developing a production-ready application is a complex and time-consuming undertaking that often involves collaboration with multiple engineering teams and stakeholders. It requires knowledge of not just the core functionality you intend to build, but also an understanding of various other functions and technologies like authentication, authorization, load balancing, containerization, and so much more. Because of this complexity, many teams elect to implement SaaS tools in lieu of developing their own infrastructure.
In a series of blog posts, I will walk you through each stage of developing a production-ready chat application in Go. We’ll use a variety of common tools and services that developers employ, including ngrok for testing, provisioning infrastructure, managing security, and deploying containerized services to public clouds.
Our journey towards a production-ready chat application begins on your local machine. For me, this is my Macbook where I will write my initial code, test it, and run demos. I'll run an ngrok agent on my laptop alongside the chat application; that agent will connect out to the ngrok infrastructure which will automatically create a new public facing endpoint with a randomly generated 'ngrok.app' URL for chat app users to access the service running on my laptop (complete with DNS entries, TLS certificates, load balancing, DDoS protection, and everything else that ngrok provides).
When the chat app user connects to the generated URL, ngrok will automatically proxy the request through the agent tunnel to the chat app on my laptop, and the response will be proxied back through the ngrok platform to the user’s browser. The final architecture will look like this:
.png)
In the future posts I’ll cover:
- Beautify the UI and add OAuth for authentication so my app is secure
- Containerize with Docker and deploy to AWS
- Orchestrate the containers with Kubernetes in Google Kubernetes Engine an load balance the application across multiple regions and clouds
- Adding persistent storage with AWS DynamoDB
CRUD app scope and requirements
When building any type of software, it is important to outline the necessary tasks for each component. This approach allows us to set goals and run tests to ensure that we meet them.
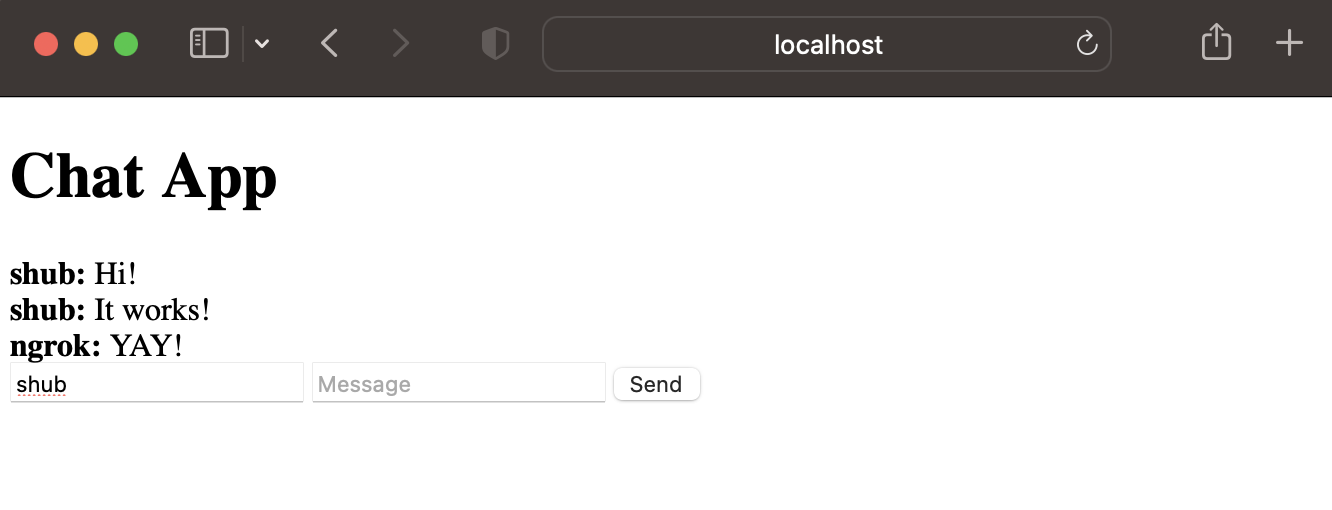
In this tutorial, we’ll be building a chat app with a simple web UI and of course that needs a field to write messages, say who we are with each message, and a button to send that message. Also, we’ll store the messages so we can read and respond to them as they come in. And what is a chat app without friends? We’ll close this off with a link we can share with our friends to demo and chat with us.
Build your chat app in Go
We’ll be using Golang to build the backend server functions, and JavaScript and HTML to render the frontend for our initial minimum viable product. You can find the code for this entire series as well as more examples in the ngrok-samples/go-crud-app-1 repository.
This build starts with the basis of sending and receiving messages. These tasks are handled by entities known as clients, and every message needs to have details like an ID, content, and the username.
We’ll start by defining the Message struct:
type Message struct {
 ID       int    `json:"id"`
 Username string `json:"username"`
 Content  string `json:"content"`
}
And then we’ll initialize a few global variables for clients, broadcast, mutex, messages, nextClientID, and nextMessageID.
var (
 clients = make(map[int]chan Message) // Connected clients
 broadcast = make(chan Message) // Broadcast channel
 mutex sync.Mutex // Mutex to synchronize access to clients map
 messages []Message // In-memory storage for chat messages
 nextClientID = 1 // Next client ID
 nextMessageID = 1 // Next message ID
)
We’ll make clients a map[int]chan Message so that we can keep track of users connecting to our app. broadcast is a channel we’ll use to send our messages to all the clients, while mutex will be used to sync our clients. We’ll store our messages in a []Message and then use nextClientID and nextMessageID to help with navigation.
However, a challenge arises immediately. When the server is restarted or refreshed, all past messages are lost. To address this, we’ll store every message in a persistent format. For this tutorial we’ll use a JSON file for simplicity. To reference the file throughout our code we’ll put the name in the storageFile constant that is also globally accessible throughout are app:
const storageFile = "chat_messages.json"With the storage in place, we can move to the user interface (UI). The goal here is to fetch these stored messages and display them on the webpage for users. This happens on the server in the loadChatMessagesFromFile function. This function reads the contents of storageFile, unmarshalls the JSON, and saves the entries in messages.
func loadChatMessagesFromFile() {
 data, err := os.ReadFile(storageFile)
 if err != nil {
  if os.IsNotExist(err) {
   // File does not exist yet, no need to load messages
   return
  }

  log.Println("Error reading chat messages from file:", err)
  return
 }

 err = json.Unmarshal(data, &messages)
 if err != nil {
  log.Println("Error unmarshaling chat messages:", err)
 }
}
To facilitate real-time interaction between the server and the webpage, we need to set up functions on the server to handle sending and receiving. In our Go code we send messages with the handleSendMessage function. This does two things. First, it decodes the message and adds it to the broadcast so it will be available to all the clients. And then it saves the message to our JSON file by calling saveChatMessagesToFile.
func handleSendMessage(w http.ResponseWriter, r *http.Request) {
 if r.Method != http.MethodPost {
  http.Error(w, "Only POST is allowed", http.StatusMethodNotAllowed)
  return
 }
 decoder := json.NewDecoder(r.Body)
 var message Message
 err := decoder.Decode(&message)

 if err != nil {
  http.Error(w, "Invalid request body", http.StatusBadRequest)
  return
 }

 message.ID = nextMessageID
 nextMessageID++

 broadcast <- message

 saveChatMessagesToFile()
}
The saveChatMessagesToFile function has the straightforward job of taking the value of the messages global variable and writing it to the storageFile.
func saveChatMessagesToFile() {
 data, err := json.Marshal(messages)

 if err != nil {
  log.Println("Error marshaling chat messages:", err)
  return
 }

 err = os.WriteFile(storageFile, data, 0644)
 if err != nil {
  log.Println("Error writing chat messages to file:", err)
 }
}
In summary, the server becomes the operational hub, handling message storage, broadcasting, and client management. Meanwhile, the webpage or client-side is tasked with interfacing with the users, showcasing the chat in real-time.
On the client, our JavaScript code is essentially calling the APIs provided by our Go code. To display messages that have been saved to the server the startReceivingMessages function will poll the /receive endpoint every second for new messages.
// Start receiving new messages
function startReceivingMessages() {
 fetch('/receive')
  .then(response => response.json())
	 .then(message => {
	  displayMessage(message);
		startReceivingMessages(); // Keep receiving new messages
	 })
	.catch(err => {
	 console.log("Error receiving messages:", err);
	 setTimeout(startReceivingMessages, 1000); // Retry after 1 second in case of error
 });
}

startReceivingMessages();
Then, our sendMessage function will gather the values from the form and send them as a POST request to /send to process the new message on the server.
function sendMessage() {
 const username = document.getElementById("username").value;
 const message = document.getElementById("message").value;

 const chatMessage = {
  username: username,
  content: message
 };

 fetch('/send', {
  method: 'POST',
  headers: {
   'Content-Type': 'application/json'
  },
  body: JSON.stringify(chatMessage)
 }).then(response => {
  if (!response.ok) {
   throw new Error("Error sending message");
  }

  document.getElementById("message").value = "";
 }).catch(err => {
  console.log("Error sending message:", err);
 });
}
Test your Go app
Now that our application is ready, it's time to test, and to do that we’ll use ngrok. With ngrok, the testing process can be made seamless and efficient. As software engineers, we no longer have to file Jira tickets and wait for infrastructure provisioning from other teams.
Let’s test our CRUD app on our local machine by starting the Go chat server. You can do this by running ‘go run main.go’ which will start the server on localhost:8080.

Congratulations! We now have the chat app running on our local machine that we can access by going to http://localhost:8080 on any browser and test by typing in a message and clicking “send”. However, keep in mind that this app isn’t on the internet yet, so only we can interact with it on the machine we are using. If we send the localhost link to one of our friends or try to access it from a phone, we won’t be able to see the chat app since it’s still on localhost.
Deploy your Go CRUD app with ngrok
Install ngrok to your machine by visiting the download page: https://ngrok.com/download.
Once you’ve finished installing the ngrok agent on your machine, go to dashboard.ngrok.com and login/signup to your ngrok account. Once you’re at your dashboard click on the ‘Your Authtoken’ tab in the menu. You should see a page like this:

Now connect the ngrok agent running on your local machine to your ngrok account. Copy the code in the “Command Line” box on the Your Authtoken page, paste it into your command line, and press enter.
Let’s take the next step in getting this app out there by putting it on the internet. Leave the command line running with your localhost app, then start a new command line window. Next, type in the following command:
ngrok http 8080After you run the command, you will see a screen like the one below.

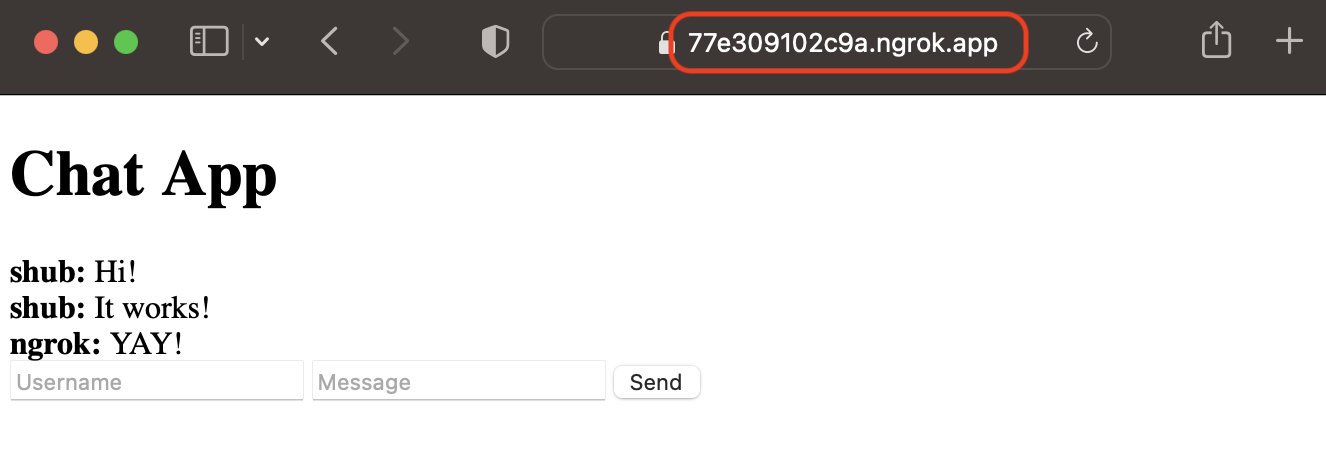
The highlighted URL is where your app lives online. This URL is randomly generated by ngrok, so yours will be different than the one you see here. You can also use a static domain, or a custom domain you already own, but that’s outside the scope of this post.
When your URL is generated, copy it and paste it into your browser. Voila! The chat app that was once confined to your local machine is now online. You can share this URL with your friends and family members, and even test it out on another device like your phone.

Now, you’ve got an app that’s running on your computer but can be accessed using a link online. Isn’t that amazing?
Celebrate! Your Go app is working and shareable
Now, you have a simple chat application that you can share with your friends through a link. It’s a basic start and meets all our requirements. However, it still lives on our local computer, and if I shut my computer down or turn the server off, I will lose access to my chat app.
In the next part of this series, we will add a better classier UI to this chat app, and use ngrok edges to add security and user tracking functionality.
Interested in learning more about testing, ngrok, or how to get started with ingress to your production apps? We’ve got you covered with some other awesome content from the ngrok blog:
- Kubernetes ingress with ngrok and Hashicorp Consul
- Add authentication to your ngrok traffic with Auth0
- How ngrok actively prevents phishing attacks
Questions or comments? Hit us up on X (aka Twitter) @ngrokhq or LinkedIn, or join our community on Slack.

